
Resize Image Online Free: Browser Workflow, Quality Notes, and Size Targets

Image Resizing Is About Fit, Not Just Smaller Files
People resize images for different reasons. A website preview needs a predictable shape. An email attachment needs a lighter file. A social card needs dimensions that will not crop the subject. A print draft needs enough detail to avoid looking soft. The right resize choice depends on where the image will be used after download.
Try These Tools
Open the related tool now and finish faster.
Resizing is one of the few image edits where the browser needs no outside help: the Batch Printer resize page draws your image onto a canvas on your own device, applies the new pixel dimensions, and hands back a download - no server upload involved. The practical benefit in the workflow is seeing the pixel-dimension controls right beside the loaded image, so the target size is a decision you make while looking at the picture, not a guess typed into a blank form.
Pick the Target Before Moving the Slider
- Web preview: use a wide, consistent size so cards line up across a page.
- Email: reduce dimensions enough for quick sending while keeping text or faces readable.
- Social sharing: match the expected crop shape before uploading to the platform.
- Print draft: avoid shrinking so far that small text and edges become soft.
- Internal documentation: pick a size that keeps the important UI or object legible in the document.
Tool Walkthrough: From Uploaded Image to Resized Result
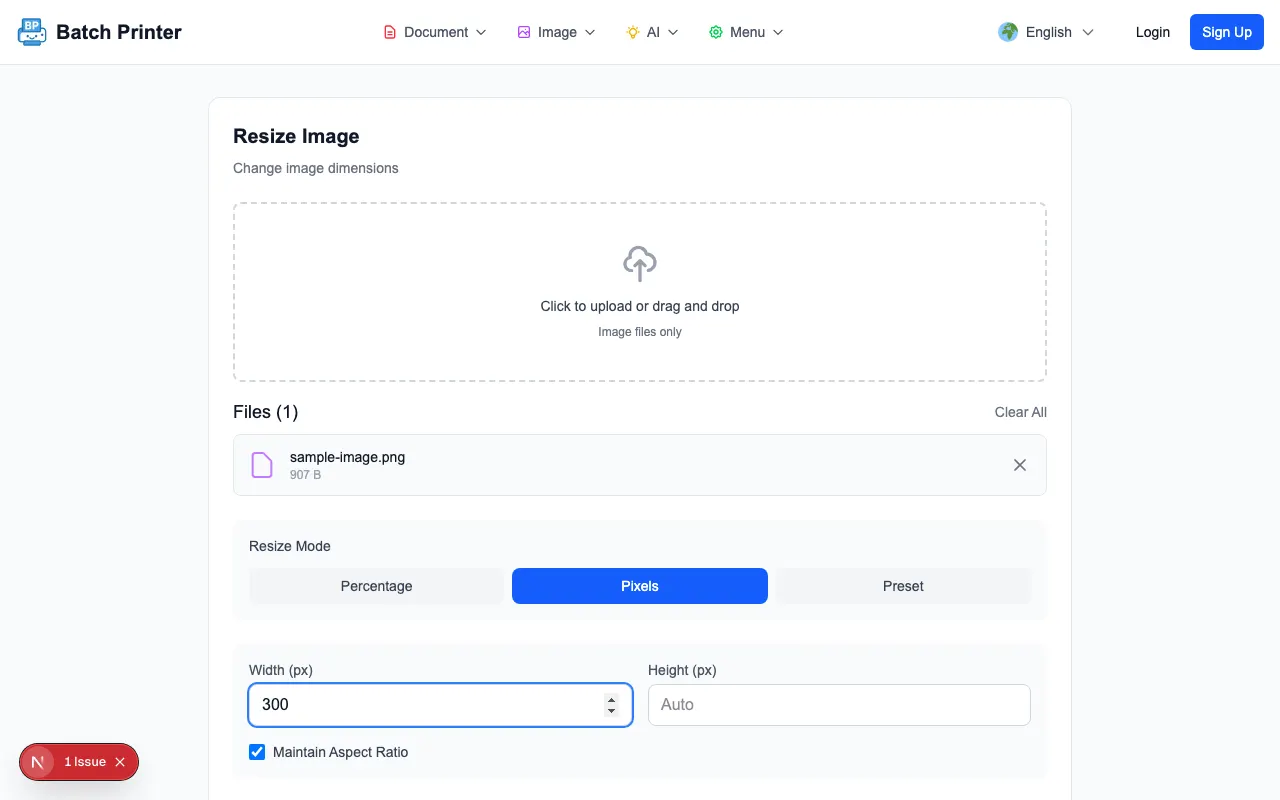
Start by opening the image resize tool and loading your image. In the tested run, the image appeared with pixel controls visible, which made the workflow feel more like setting an output spec than guessing at a compression preset.
- Step 1: Load the image and confirm the preview is the file you intended to change.
- Step 2: Set the width or height in pixels when you need an exact output size.
- Step 3: Keep the aspect ratio locked unless you intentionally need a stretched image.
- Step 4: Choose an output format that fits the destination: JPEG for most photos, PNG for transparency, or WebP for modern web use.
- Step 5: Download the result and open it once to check edges, text, and subject placement.
Quality Observations From the Test Resize
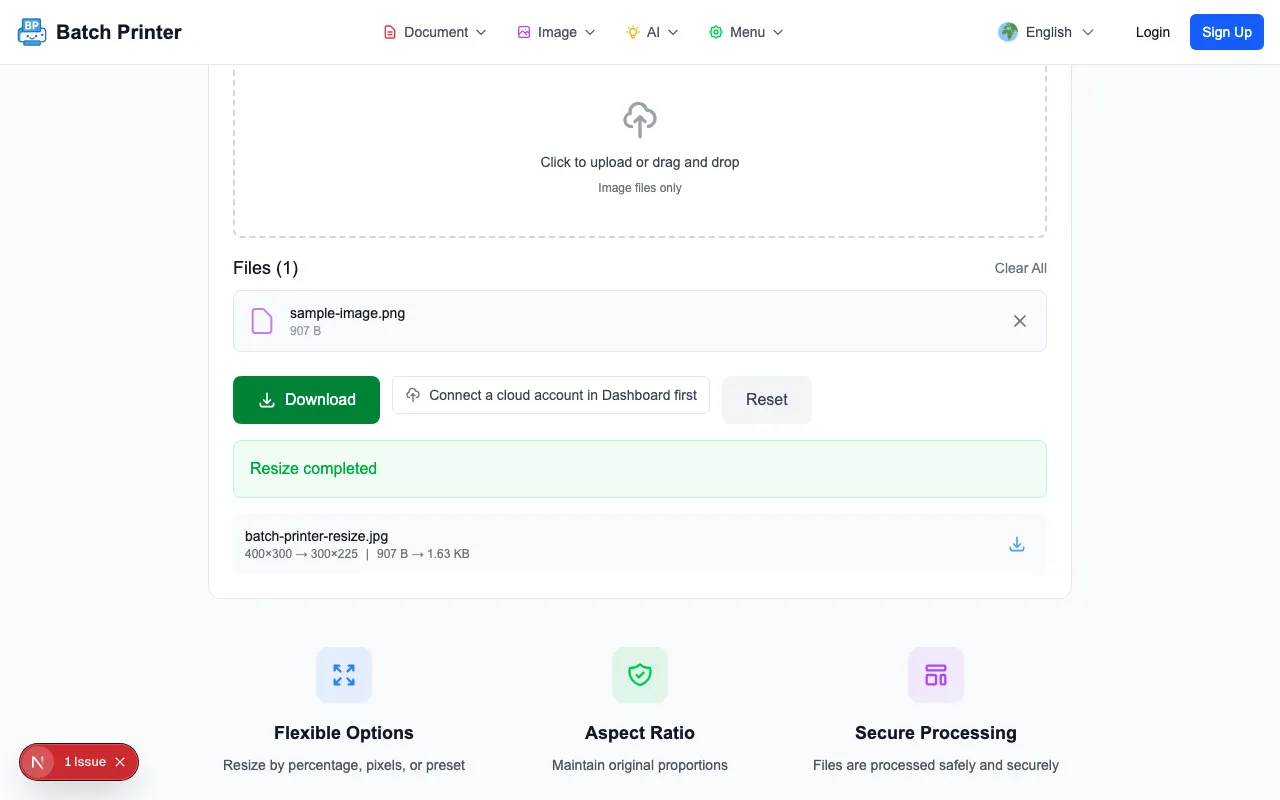
The resized sample was best when the output was smaller than the original and kept the same proportions. Edges stayed clean enough for a web or email use case, and the result screen made it clear when the resized file was ready. The place to be careful is aggressive enlargement. Upscaling can make a file bigger in dimensions, but it cannot invent detail that was not present in the original image.
Compression settings also require judgment. Lower quality can be fine for a small preview, but it may introduce blocky edges around text, icons, or high-contrast shapes. If the image contains a product label, screenshot text, or a face, download a test result and inspect it at the size people will actually see.
Pitfall Guide: Avoid Distortion and Soft Results
- Stretching width and height independently, which changes the shape of faces, logos, and screenshots.
- Upscaling a small source image and expecting it to become sharp.
- Using a highly compressed setting for images that contain text.
- Exporting every image as PNG even when a photo would be lighter as JPEG or WebP.
- Forgetting to check the crop area required by the site or app where the image will be uploaded.
Output Format Choices
JPEG is the safe choice for ordinary photos and email attachments. PNG is better when transparency or crisp flat graphics matter. WebP is useful for modern web publishing because it often balances visual quality and file weight well. If the destination gives strict format rules, follow those rules first and treat file size as the second priority.
Quick-Reference Size Table
- 1200 x 630: open graph and link preview images.
- 1080 x 1080: square social post draft.
- 1080 x 1920: vertical story or phone-first visual.
- 800 x 600: email-friendly image when the recipient only needs a clear view.
- 1920 x 1080: wide presentation or video-thumbnail draft.
- 600 x 400: compact documentation screenshot when text is still readable.
FAQ for Browser Image Resizing
Do images upload to a server? In this resize workflow, processing happens locally in the browser. That reduces unnecessary transfer, although you should still follow your own device and file-handling rules.
Should I resize or crop first? Crop first when the subject placement matters. Resize first when the full image shape is already correct and you only need a different output size.
Which setting should I test first? Set the target width, keep aspect ratio locked, choose the required output format, then download and inspect the result at the actual display size.
Try These Tools
Open the related tool now and finish faster.